

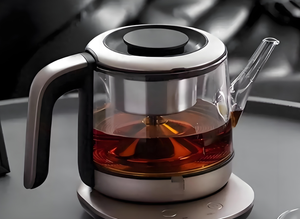
Inspection and testing of household electrical appliances (electric kettles)
Drinking more hot water is good for your health. At the age when you should pay attention to your health, a pot of clean hot water is essential after soaking the wolfberries. Therefore, choosing a safe and easy-to-use electric kettle is crucial.
So, how should electric kettles be inspected?
1. Classification of electrical appliances <br>Electrical appliances can be divided into the following categories:
-
Electric heating appliance : refers to an appliance equipped with an electric heating element but without an electric motor.
-
Electric appliances : appliances that are equipped with electric motors but do not have heating elements.
-
Combined appliance : refers to an appliance that is equipped with both an electric motor and an electric heating element.
2. Types of Electric Heating Appliances and Electric Kettles
-
Common electric heating products include electric kettles, electric coffee makers, electric irons, sandwich makers, toasters, heaters, ovens, etc.
-
Electric products include vacuum cleaners, egg beaters, blenders, electric fans, juicers, etc.
-
Combined appliances such as hair dryers, humidifiers, etc.;
-
Large household appliances include air conditioners, refrigerators, washing machines, range hoods, etc.
Electric kettles are mainly divided into the following types according to their base connection methods:
-
Direct plug-in
-
360-degree rotating
-
Plug-in power cord (with tail plug)
Appearance Notes:
-
If the kettle body is made of plastic, please make sure the color of the kettle body and the base are consistent. Different materials may cause color differences, so please check the customer's order, reference samples and color box photos to confirm.
-
Plastic parts should be inspected for defects such as flash, shrinkage, air marks, and scratches. The gaps between assembly parts should be uniform, typically no larger than 0.8mm, and free of looseness or deformation.
-
The surface of metal parts must be checked for scratches, rust, poor electroplating, fingerprints and other problems. The appearance effect (such as stainless steel mirror or matte) must meet the requirements of the order and sample.
-
It is recommended to take photos of the bulk product and the color box together for comparison.
3. Basic test items
-
Transportation drop test
-
Product Size / Power cord length / Weight Measurement
(When measuring, the tape measure needs to be straightened. If the first section of the tape measure is loose, you can start measuring from 10cm) -
Bar code scan check
(You can use the mobile phone APP to scan the QR code. If the link cannot be accessed, take a photo of the link and make a note.) -
Assembly/installation check
-
Coating Adhesive Tape Test
-
Stability test
(Add water to the maximum scale and place the power cord in the most unfavorable direction) -
High voltage test
-
Power on check
(Please wait for 5 minutes to cool before adding cold water, and check whether the lid can be opened and closed normally, and whether it is loose or difficult to open) -
Earth continuity test (Earth continuity test, if applicable)
-
Power consumption check
-
Power cord strain relief test
(If there is no dedicated tensioner, you can hang a corresponding weight for testing. It is recommended to avoid noting the lack of equipment in the report.) -
Internal workmanship and critical component check
-
Rubbing test for rating label and adhesive test for printing, marking and logo
Additional tests for 360-degree rotating products:
14. Jug body 360 degree rotation check
Add water to the lowest water level, connect the rated voltage and turn on the machine, slowly rotate the kettle body clockwise and counterclockwise along the base for two circles, and check whether the contact between the kettle and the base is continuous and good, and there is no functional interruption.
(Additional requirement: When a 0.5mm thick gasket is placed between the kettle body and the base, there should be no poor contact)
15. Boiling hot water temperature check
Add water to the highest water level, connect the rated voltage and start the machine. After the steam switch automatically trips, measure the water temperature at the center and record it.
The water should not splash during the boiling process and the lid should be closed normally.
(The water temperature should usually be ≥98°C. The tripping time depends on the structure. If the steam switch is located under the handle, it may be slightly slower.)
16. Capacity check
The actual capacity should match the declared value, with a tolerance of typically ±5%.
17. Timing accuracy check (only for products with timing function)
Set the maximum timer according to the instructions and operate the machine to measure the actual time. Unless otherwise specified by the customer, the tolerance is usually: ±1 minute for electronic models and ±10% for mechanical models.
18. Dry boiling check
There is no water in the kettle, apply about 70% of the rated voltage, and check whether the temperature control switch operates as expected and no safety problems occur.
(Observe for yellowing, plastic deformation, and whether the temperature control trip is too slow)
19. Handle strength check
Apply a bending stress of 100N to the handle fixing system and maintain it for 1 minute.
Or: The handle assembly should be able to withstand a load equivalent to twice the weight of the unit water (including the weight of the lid) for 1 minute.
After testing, there should be no failure of the fixing system (such as riveting, welding, etc.).
20. Smell check
Add tap water to the lowest water level, connect the rated voltage, and check whether the hot water or the kettle emits any odor during the boiling process.
twenty one. Full function check
Operate and check all functions stated in the manual, including installation/assembly, adjustment, switch/knob operation, settings and other actual use functions. All functions should work normally and meet the specifications.
4. Basic structure and safety features
-
Products usually have logos and require silk screen printing and pasting testing.
-
There are often scales on both sides of the pot body, and capacity testing is required.
-
Unpack and inspect the internal structure, and check the critical components list (CDF).
-
The indicator light should be clearly visible at a distance of 1 meter without displacement.
-
The dry-burn test can be performed by lowering the voltage to avoid severe discoloration of the heating tube, and mainly tests the thermostat at the bottom of the heating plate.
-
The water boiling test mainly checks the steam temperature control structure.
Standard products usually have three levels of protection (old-fashioned plug-in models may not have):
-
Steam temperature control : located at the handle switch or the old integrated temperature control.
-
Anti-dry boil protection : If the steam temperature control fails and the water continues to boil dry, the thermostat at the bottom of the heating plate should start to cut off the power.
-
Fuse protection : If all the above temperature controls fail, the continued rise in temperature will cause the plastic push rod inside the thermostat to melt, thus permanently cutting off the circuit. (This test can be attempted with a spare sample if necessary.)
-
The nameplate logo must be reflected on both the pot body and the base.
Share this product
Inspection and testing of household electrical appliances (electric ke
Drinking more hot water is good for your health. Now that you're at the age where you should be using a thermos, and you've already picked up some goji berries, how can you miss out on a pot of clean, hot water? Therefore, choosing a safe and easy-to-use electric kettle is particularly important. So how do you inspect the electric kettle?